Term 2, Week 2

Paper Metal Clay
Instructions
Make a pair of woven silver earrings. Earrings must be matching and feature handmade earring wires. The woven earrings should be around 30mm in length and at least 15mm wide so that the woven texture can be properly seen and judged by your mentor. This is a guide but note that we should be able to see a significant amount of woven silver.
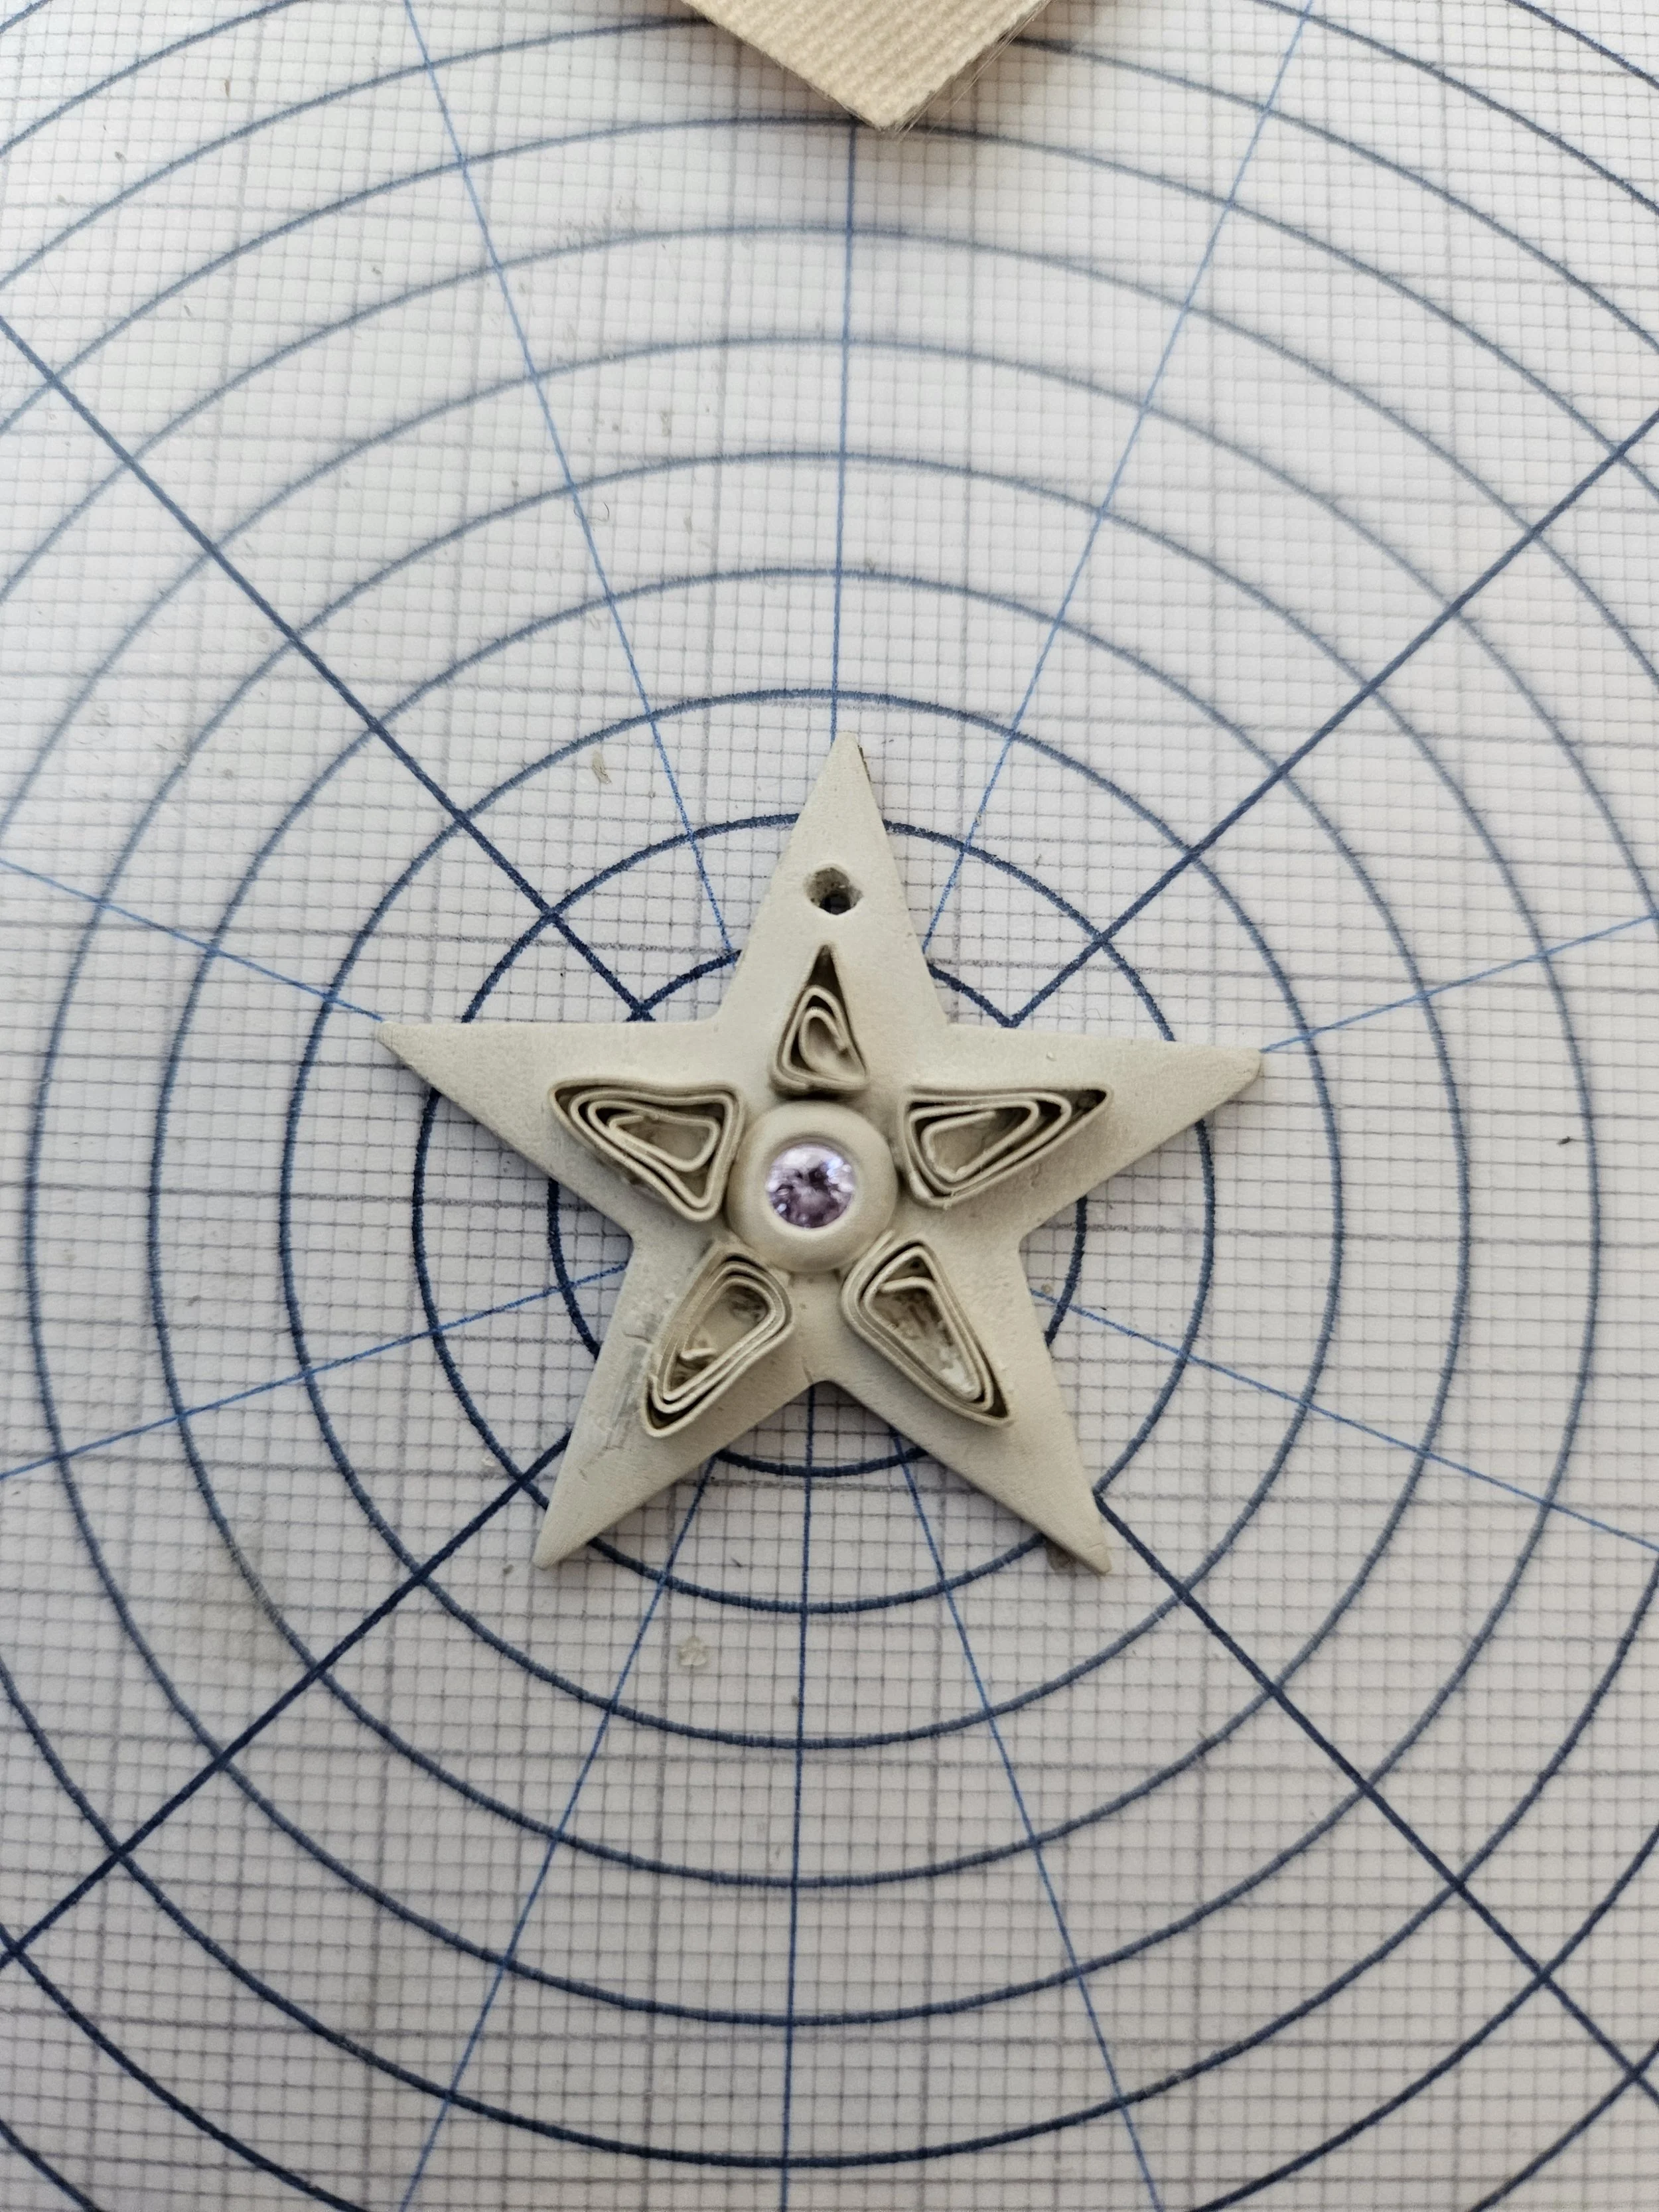
Make a pendant that features a quilling design and fireable stone. The quilled pendant must feature at least one quilled section but you can include more. It must also include a fireable stone.
Make a pair of windmill earrings that spin. The earrings must have handmade earring wires. For assessment we want you to make the spinning windmill variation of this project. This is so we can check that your pieces do have movement
The paper clay turned out to be really difficult to use. When filming the original course there was a type of paper clay in that was easier to handle. Unfortunately this was discontinued by the company so a substitute was used. This substitute could not have any water applied, had to be used quickly to avoid drying out and the origami project would not be suitable to sell or wear - see the notes below.
Woven earrings
The metal clay had to be woven and then backed onto silver clay. The weaving itself went well, but when trying to adhere it to the backing the moisture made the paper clay very brittle and it broke easily.
I started by making a pair of pyramids, but after firing I noticed that in places the weaving had broken (see the photo above, top row of weaving - the clay was starting to crack). I remade them and added some fine silver hieroglyphs with my favourite phrase ‘To Give Life’.
Quilling
I had been looking forward to doing this, and generally the quilling went well. Adhering the quilling to the back plate proved challenging. I started off making a quilled Eye of Horus, but it was very weak in terms of the way the paper clay sat on top of the back plate. I changed the design and made a star. One of my course mates discovered that instead of using water to attach, pritt stick worked well. I am grateful to this course mate for finding this technique and passing it on to the group. It was very difficult to clean up the back plate once the quilling was adhered without damaging the quilling.
Windmill earrings
This project went very well, using the origami technique to make windmills that spin on the ear wire. The issue here is that the paper clay is so thin, even after firing, that they would not stand up to wear and tear. I submitted them for marking flat - without the ear wires, as I felt they would have bent or broken in the post.